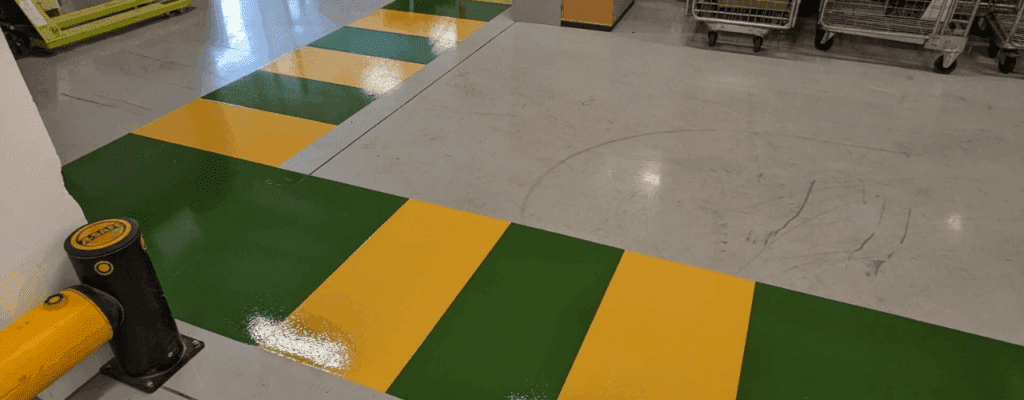
How Colour Zoned Industrial and Commercial Resin Flooring Can Improve Workflow Efficiency
In busy commercial environments, unclear movement and poorly defined work areas often slow operations. Forklifts...
Read More
When floors lose texture or start shedding, teams detour and loads wait. Choose duty by zone, phase works to shift patterns and keep a simple cleaning routine to protect throughput. Here’s how to specify it, install it, and keep it working.
Need a plan for your site? Book a site survey and works programme. We’ll map traffic and loads, shortlist systems by duty, and phase around shifts so you stay productive. We offer free quotations and site visits. See our factory and warehouse flooring overview for examples and options.
We classify resin floors by type and duty/thickness; warehouses typically shortlist Type 3–5 (coatings/self‑smoothers) and Type 6–8 (heavy‑duty flowable/screeds).
That framework lets you match environment and usage to a proven duty level instead of guessing.
Map traffic, point loads, and temperature to a duty level; turn‑zones and rack legs push you to Type 6–8, straight‑through aisles often suit Type 3–5.
Start with what the floor endures day‑to‑day in your factory and warehouse:
Not sure on duty class? We’ll map loads and routes, then specify a build‑up you can maintain without over‑texturing the whole site.
Stage lanes and aisles and protect live routes. Target 24–48 h returns where chemistry and temperature allow.
Keep the building running. Phase in lanes or zones, tape and protect live routes, and schedule works to shift patterns. Many coatings and self‑smoothers return in 24–48 hours (temperature and chemistry dependent). Some epoxies return to use in around 24 hours; confirm chemistry and site conditions during planning. Heavy‑duty screeds take longer. They are worth it for turn‑zones that chew through thinner films.
Typical sequence: prep → repairs → prime → body coat(s) → seal/top → line marking → QA. We issue diversion maps and access plans, so ops and safety teams know exactly what is live.
Illustrative scenario: We upgraded turn‑zones under racking to a Type 7 flowable build and finished aisles in a Type 4 coating with line marking. Two weekend phases; Monday dispatch held.
We will walk the floor, mark live routes, and hand you a draft phasing map with cure windows. You will see which lanes we can turn around in 24–48 hours and where heavier builds need longer. Start here: Get a quote & site survey.
Build grip where risk exists (docks, ramps, wet rooms) and verify after the final coat with recognised in‑situ methods (e.g., pendulum).
Most of the warehouse stays dry and should clean quickly. Focus grip where the risk lives: docks, ramps, wet goods rooms, external thresholds. Build texture with selected aggregates. Seals can change micro‑texture, so for acceptance and periodic checks, use recognised in‑situ methods (e.g., pendulum) at the locations you flagged.
Different areas need different builds. Here’s a practical split that keeps maintenance simple:
They cover large areas fast, clean easily, and take crisp line marking. We install them by squeegee and roller at <1–4+ mm. Because thin films reflect the slab, we grind and prime and apply two pigmented coats. Where needed, we pour a self‑leveller to smooth minor undulations. You can add a graded broadcast for targeted grip, then seal. Choose gloss or matt finishes and multiple aggregate colour blends to support walkway and hazard demarcation without compromising cleanability.
Good fit for: wide‑aisle travel, pick/pack, staging, mezzanine decks, and general Warehouse Flooring where fast return helps ops.
See: Epoxy Coatings & Self‑Levellers
These thicker, filled systems resist turn abrasion and point loads. We hand‑trowel at 6–9 mm for harsh industrial use. Prep includes grinding, local epoxy mortar repairs, priming, and perimeter anchor channels to lock edges. We lay a scratch coat with 0.8–1.2 mm broadcast to key the build before topcoats. They work well under rack legs, at turn‑zones, and at loading docks. They take coloured seals and line marking well, and they tolerate knocks that crater thin films. PU screeds are VOC‑free, steam‑cleanable at 9 mm, operate from ‑40°C to 140°C, are stronger than concrete, and offer excellent slip and abrasion resistance. Fast‑cure options exist for the right zones; confirm during planning.
Good fit for: turn‑zones, end‑of‑aisle impacts, transfer aisles, FLT charge bays, and any Warehouse Flooring that sees repeated hard‑wheel traffic.
See: PU Screed
Resin’s seamless, chemical‑resistant surface cleans faster, supports line marking, and allows local refresh, which reduces outages versus jointed or bare finishes.
Fewer joints mean faster scrubbing and simpler hygiene checks. It resists oils and chemicals and stands up to forklift traffic and heavy machinery. You can patch or refresh locally instead of replacing large areas. That approach reduces unplanned outages and extends service life without ripping up the slab.
Remove grit, match pads and detergent to the surface, scale frequency to traffic, and plan refresh coats where wear concentrates.
Grit accelerates wear under hard wheels; sweep it early and often. Use pH‑appropriate detergents and pads matched to the surface, scale frequency to traffic, and deal with oils fast. Log locations, dates, and photos, then schedule refresh coats where wear concentrates in turn‑zones. That’s how Warehouse Flooring keeps its performance year after year.
Quick routine: remove grit daily, scrub to schedule, spot clean spills, log periodic checks, and plan refresh/patch works during low‑traffic windows.
We’ll survey your slab, confirm loads and routes, and agree a duty class per zone. We hand‑trowel or squeegee‑and‑roller the system as specified, then log batch numbers and cure windows in the QA pack. For PU screed zones we also cut perimeter anchor channels and record those details in the method statement. Then we’ll phase works around shifts and provide a clear QA pack: prep/repair log, materials batch records, cure/return timings, photos, and marked plans. You get a floor you can sign off and a method to keep it that way.
We’ll help you pick a duty class by zone, phase a programme around shifts, and hand over a simple maintenance plan so performance holds up under real loads.
We install UK‑made systems from KDR Resin Systems and RESDEV.
On the first visit we survey the slab, confirm routes, and hand you a draft phasing plan with cure windows.
Book a site survey. Free site visit. No obligation.
You’ll get duty by zone, a phasing map, cure windows, and a cleaning schedule.
Or learn more on our warehouse flooring page before you book.
Experts in epoxy and polyurethane flooring systems

In busy commercial environments, unclear movement and poorly defined work areas often slow operations. Forklifts...
Read More