When laying resin driveways, you need to check whether the surface is suitable, whether the base is stable and if there’s any damage or cracks on the surface.
Preparation
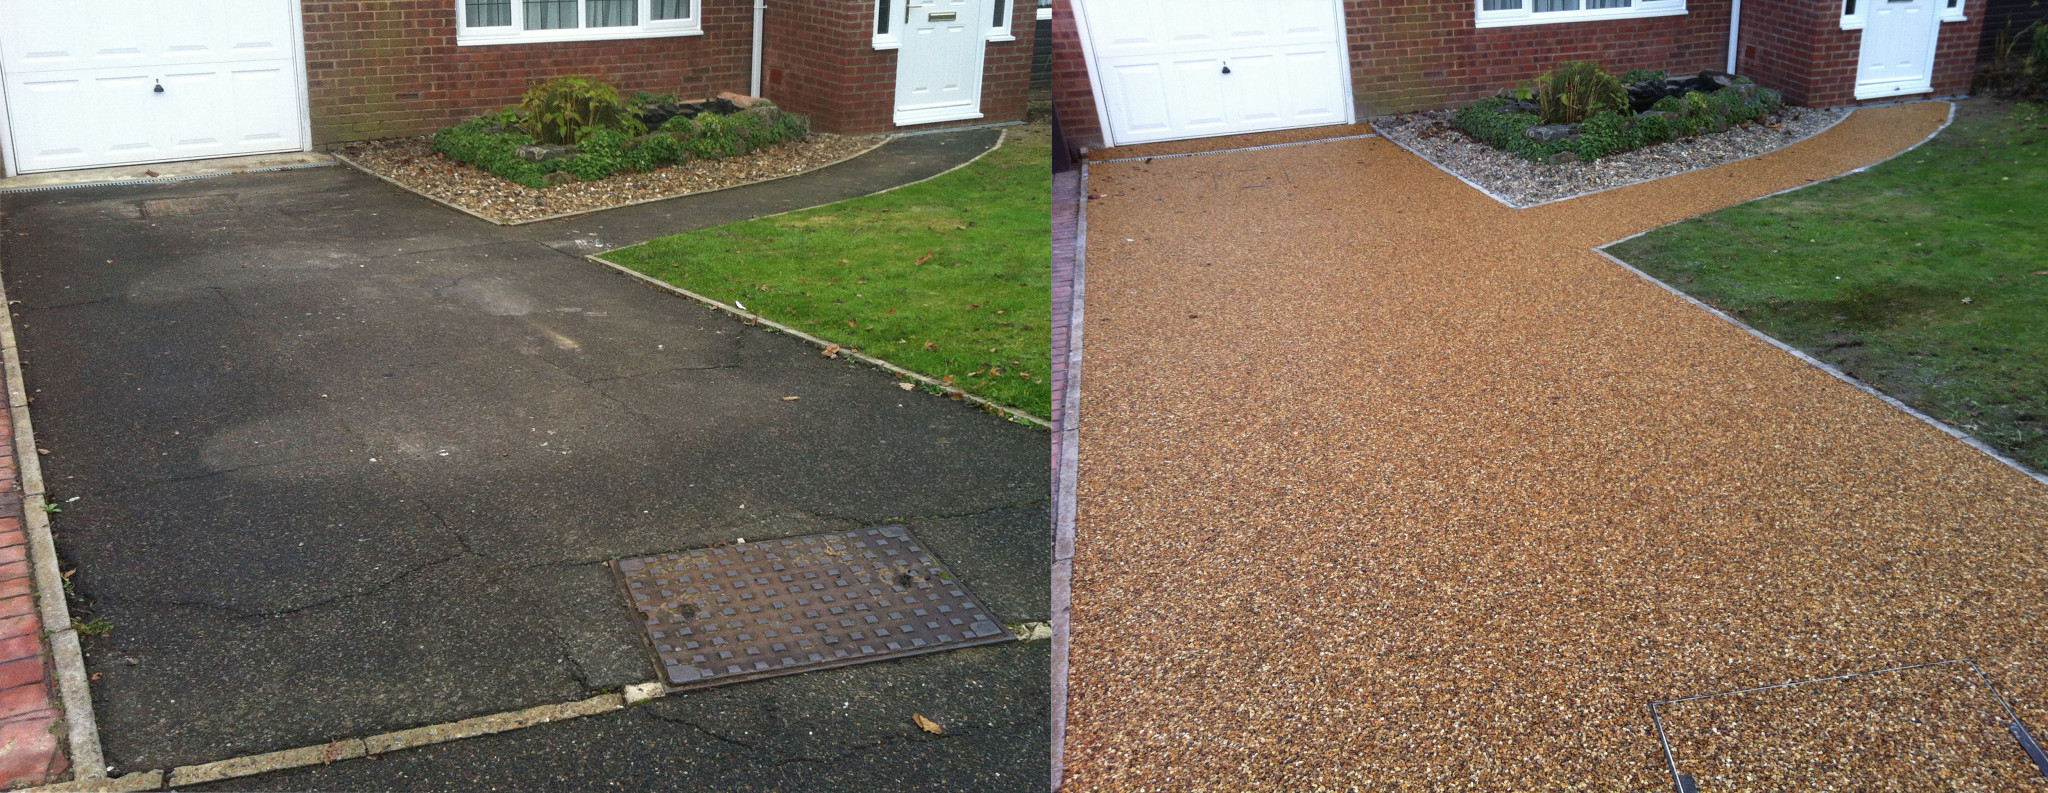
As always, it is important to get the prep work done. If you’re turning grass into a driveway, the bulk of the cost will be in the groundworks. You would need to dig out, lay stone, lay porous macadam and edges before you can even start the resin. The surface needs to be cleaned and dried. A suitable resin bound system base needs to be stable to manage the load it is expected to take once completed; this could be asphalt or concrete.
Crack repair
If you’re working with an old surface, such as concrete, you may need to do some crack repair work or infills before it is ready for resin. You want a fairly flat and strong sub-base. On a concrete surface, you would first treat the surface with a polyurethane primer to assist with the adhesion. You would then install while the primer is still wet. The most important thing is to get the ratio of aggregate to resin right as too much resin and you will get a reaction with moisture, causing white stains, too little resin and the surface will be weak and chewy.
Mixing
Before mixing, it is important that you do not start the installation if it is raining. Using a hygrometer, check if the humidity level is below 80%. If it is above 80%, you cannot start working. Make sure the base surface has been primed and dried. Check your aggregates and other materials for quantity, batch and colour. Measure the work area again to ensure you have all the materials you need for the driveway and ensure all your equipment is clean and ready for use. Make sure all edges of your work area have been protected with tape to avoid resin staining. The mix is usually mixed for around 3-5 mins and then poured out and mixed into the wet edge. The process of mixing and laying a resin bound driveway is simple but requires absolute accuracy at every stage to ensure success. Do not try and take shortcuts.
After mixing
- Empty the mix into a plastic lined wheelbarrow.
- Switch the mixer off and make sure all of the mix is scraped from the mixer. The forced action mixer must be cleaned thoroughly after use and if you change the mix to avoid contamination.
- Make sure your aggregates are not damp or moist prior to mixing.
- You must mix for sufficient time to avoid any material being left uncoated.
- Ensure every mix is the exact same duration.
- Make sure the correct blend of aggregates is used.
- Keep aggregates in the shade.
- Look at the surface that has previously been trowelled, checking for inconsistencies at every possible angle. Marks and anomalies can be easily fixed at this stage, but not later on after the mix has cured.
- Plan the laying route and grid the area out in squares with chalk.
- Lay batons to indicate where the mix should be laid.
- You may use a screed bar to even out the mix further, prior to trowelling.
- Make sure the trowel is cleaned thoroughly with white spirit prior to trowelling. It should be cleaned regularly throughout the trowelling process. We recommend this be done approximately every six strokes. A dirty trowel will become sticky and will drag aggregates out of place.
- Pack aggregates into every edge to ensure there are no gaps.
- Knit the mix together, making sure the aggregates form a closely compacted, level surface. Use the trowel with the edge slightly raised away from the stroke, applying consistent pressure to prevent the trowel from digging into the mix.
- The mix should be trowelled until the aggregates stop moving in a fluid movement and become solid. This must be done in as few strokes as possible.
- Once levelled and compacted, the surface can be smoothed (polished). This will help to leave an attractive sheen on the surface.
- Ensure the edge of each trowelled section is rough and unworked so the next batch of aggregate can seamlessly and easily blend into it.
- Add a light and even sprinkling of crushed glass or sand to provide additional slip resistance.
- Finally, a hover trowel is used on the surface just to ensure the finish is as uniform as possible. After this is done, it needs to rest for 24 hrs before foot traffic and 48 hours before vehicle traffic.
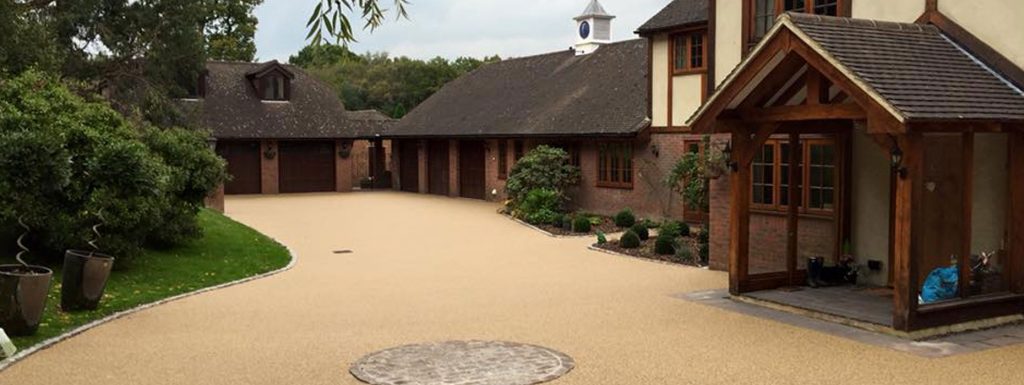
A resin bound system is a versatile, hardwearing and low maintenance surface solution that brings a huge range of benefits compared to other surfaces. In order for a new resin bound surface to deliver on each of its benefits, it must be installed correctly from start to finish.
Once completed, mark the area clearly with cones and tape to prevent anybody from accidentally walking on the surface before it is ready.
You should use UV resistant resins for external applications, such as driveways. This will help prevent the breakdown and discolouration of the surface over time.